You’ve spotted a crack in your stucco. Maybe a few. Now you’re standing in the hardware store aisle staring at repair kits, or you’re Googling contractors and wondering what this is going to cost. The question isn’t really “can I fix this myself?”—it’s “should I?” Because in Orange County, FL, where humidity and heat put constant pressure on exterior walls, the difference between a repair that holds and one that fails in six months often comes down to knowing what you’re actually dealing with. This isn’t about whether you’re handy. It’s about whether the crack you’re looking at is truly minor, whether your climate is working against you, and whether the money you save today turns into a bigger bill tomorrow. Let’s walk through what actually matters when you’re deciding between a DIY patch and a professional repair.
When DIY Stucco Repair Makes Sense vs When You Need a Pro
Not all cracks are created equal, and not all repairs require the same level of skill or risk. The decision to DIY or hire a professional comes down to three things: the type of damage, what’s causing it, and what happens if the repair fails.
True minor stucco repair—the kind that’s actually safe for a homeowner to tackle—involves hairline cracks less than 1/8 inch wide, small cosmetic chips, or isolated surface damage covering less than two square feet. These are usually caused by normal settling, minor thermal movement, or superficial wear. If the crack is only on the surface and there’s no soft spots, water staining, or bulging around it, you’re likely looking at something manageable.
But here’s where it gets tricky in Central Florida. A crack that looks minor on the outside can be an entry point for moisture in a climate that delivers humidity and afternoon thunderstorms like clockwork. If that crack runs deeper than the finish coat, or if it’s located near windows, doors, or roof lines where water naturally concentrates, a DIY patch might seal the surface while moisture keeps working behind it. That’s not a repair—that’s a countdown to rot, mold, and a much more expensive fix.
Stucco Hairline Crack Repair: When a Caulk Gun Is Enough
Hairline cracks—those thin fractures that are barely wider than a credit card edge—are the most common stucco issue homeowners face, and they’re also the most DIY-friendly. If you’ve got a handful of these scattered across your walls and they’re not growing, not weeping moisture, and not located at stress points like window corners, you can often handle them with the right materials and a little patience.
The key is surface preparation. You can’t just smear caulk over a dirty crack and call it done. The area needs to be clean, dry, and slightly widened so the repair material actually bonds instead of sitting on top. Most pros will tell you to gently widen a hairline crack to about 1/4 inch using a chisel or utility knife, then brush out all the dust and debris. It feels counterintuitive—making a crack bigger to fix it—but it works because it gives the elastomeric caulk or stucco repair compound something to grip.
Elastomeric caulk is your best friend here. It’s flexible, which means it moves with the stucco as temperatures shift, and it’s designed to handle the expansion and contraction that happens in Florida’s heat. You’ll want a sanded or textured version if your stucco has any kind of rough finish, because smooth caulk on a textured wall stands out like a scar. Apply it with a caulk gun, smooth it with a putty knife, and if your stucco has texture, dab it lightly with a damp sponge while it’s still workable to blend it in.
Here’s the honest truth: even a well-done caulk repair might leave a faint line. When the wall gets wet from rain, caulk doesn’t darken the same way stucco does, so you might see a slight difference in tone. That’s normal. If that bothers you, plan to paint the entire wall after the repair cures. But if the crack is small, the repair is clean, and you’re okay with a little imperfection, this is a totally reasonable DIY project that can cost you under $30 in materials and an hour of your Saturday.
The catch? This only works if the crack truly is just a surface issue. If you see any signs of moisture—discoloration, soft spots, or cracks that seem to go deeper than the finish coat—stop. That’s not a caulk-and-go situation. That’s a call-a-pro situation, because sealing moisture inside your wall is worse than leaving the crack open.
What Makes a Crack “Not Minor” and Why It Matters in Florida
The line between minor and major stucco damage isn’t always obvious, especially if you’re not looking at stucco walls every day. But in Central Florida, where moisture is a constant threat, knowing the difference can save you thousands in remediation costs.
A crack stops being minor when it’s wider than 1/4 inch, when it runs vertically (which can indicate foundation movement), when it’s located at a stress point like a window corner or door frame, or when there’s any evidence of water intrusion. Water staining—those brown, yellow, or dark streaks that appear around cracks—means moisture has already gotten behind the stucco. Soft spots, bulging, or areas where the stucco sounds hollow when you tap it are red flags that the damage goes deeper than what you’re seeing on the surface.
Florida’s climate makes this worse. High humidity means stucco is constantly absorbing and releasing moisture. When cracks let water in during a storm and that water gets trapped behind the finish coat, it doesn’t just sit there. It degrades the base coats, weakens the lath, and creates conditions for mold and rot in the wood framing behind the wall. The thermal expansion and contraction from summer heat and cooler nights also put stress on repairs, so anything that isn’t done right the first time tends to fail faster here than it would in a drier climate.
Structural cracks—the kind caused by foundation settling or shifting—are another category entirely. These often show up as diagonal cracks radiating from corners, or as long horizontal cracks that follow the block lines underneath. If you’re seeing these, the stucco crack is a symptom, not the problem. Patching it won’t help, because the underlying movement will just crack it again. You need a foundation inspection and a repair plan that addresses the root cause, not just the cosmetic damage.
And then there’s the issue of widespread cracking. If you’ve got cracks all over multiple walls, that’s usually a sign of improper installation, inadequate curing when the stucco was first applied, or a systemic moisture problem. A few isolated hairline cracks? That’s normal wear and tear. A spiderweb of cracks across large sections? That’s a professional job, and possibly a full remediation project.
The bottom line is this: if you’re not 100% certain the damage is purely cosmetic and limited to the surface, don’t guess. A stucco inspection from us at CF Stucco and Painting costs less than trying to fix the wrong problem, and it gives you a clear answer about what you’re actually dealing with.
How to Patch Stucco Cracks: What Actually Works and What Fails
If you’ve decided a repair is within DIY territory, the next question is how to actually do it in a way that lasts. The internet is full of tutorials, but not all of them account for Florida’s climate, and not all of them will give you results that hold up past the next rainy season.
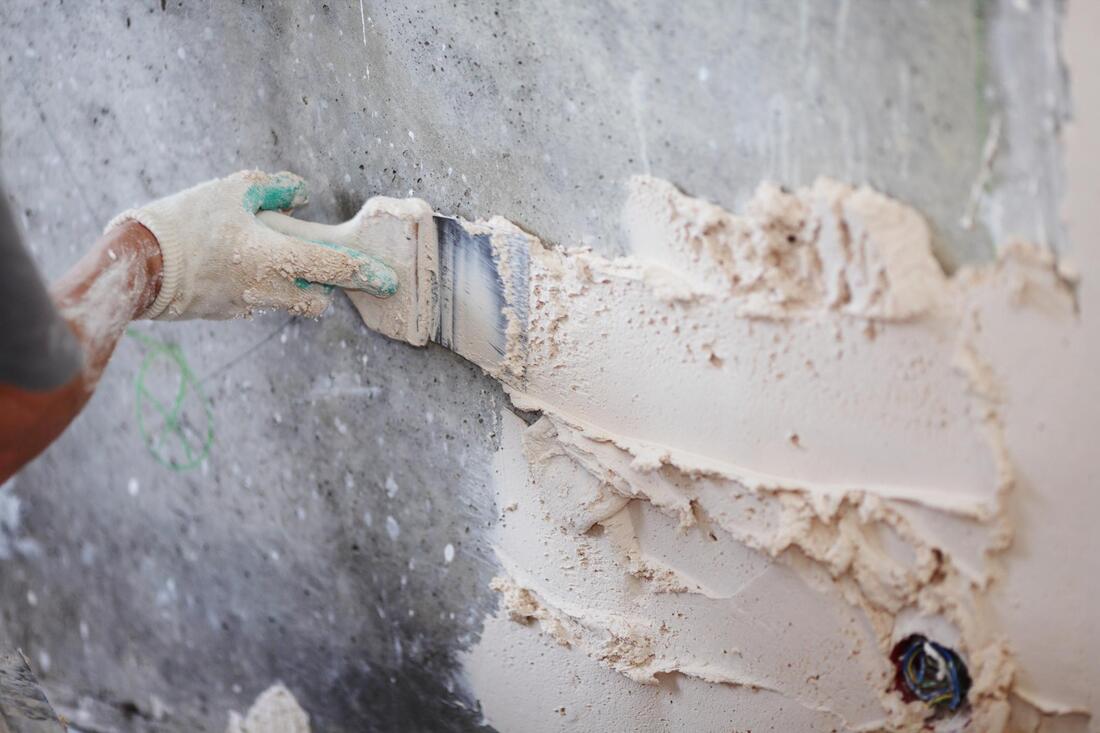
The process starts with preparation, which is where most DIY repairs go wrong. Stucco won’t bond to dirt, dust, loose material, or moisture. If you skip the cleaning step or rush through it, your patch will look fine for a few weeks and then start pulling away from the wall. Use a wire brush to remove any loose stucco around the crack, then wipe the area down and let it dry completely. In Florida’s humidity, “completely dry” might take longer than you think, especially if you’re working in the shade or during the summer.
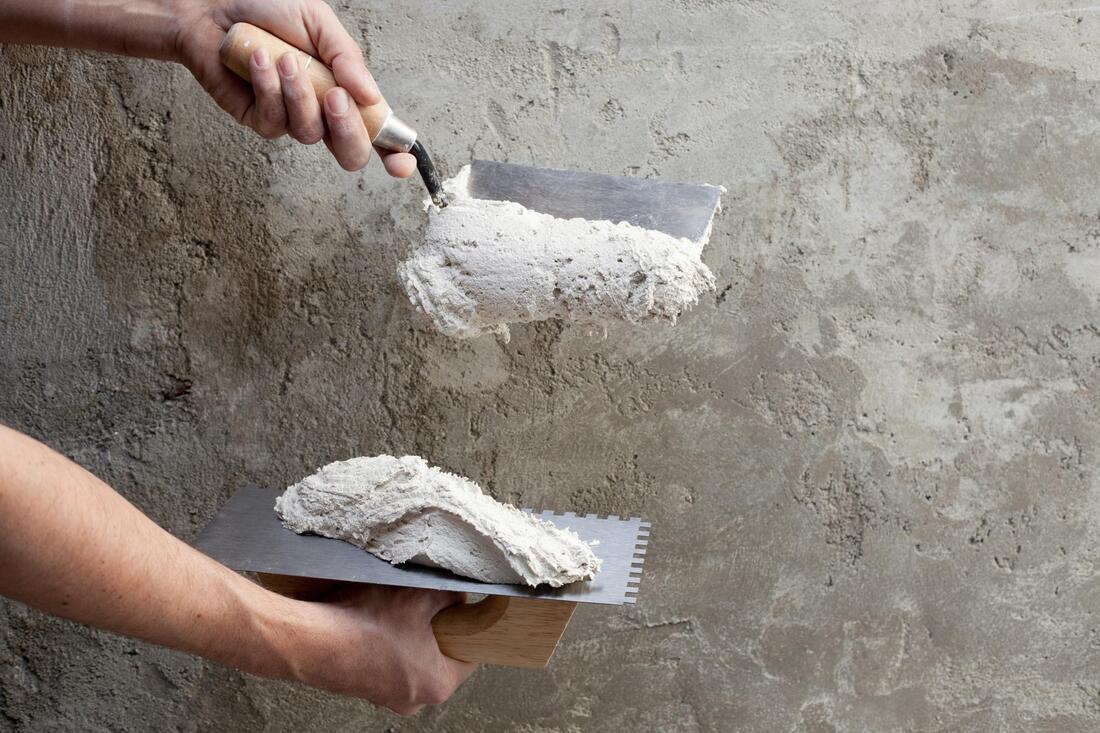
Once it’s prepped, you’ve got a choice of materials. For hairline cracks, elastomeric caulk is the easiest and most forgiving option. For slightly larger cracks or small holes, a pre-mixed stucco patch gives you a more durable result, but it’s trickier to work with because you have to match the texture and you’re working against a clock as it starts to set. Traditional stucco mix—the kind you mix yourself from cement, sand, and water—gives you the most control and the best bond, but it requires more skill and the right mixing ratios, which vary depending on your specific stucco system.
Best Way to Repair Stucco Cracks Without Making Them Worse
The best repair is the one that doesn’t fail in six months, and that means understanding the mistakes that cause failures in the first place. The most common DIY error is sealing moisture inside the wall. If you patch a crack that’s been letting water in without first addressing the moisture, you’ve just trapped that water behind your repair. In Florida, that moisture doesn’t evaporate—it spreads, it degrades the surrounding stucco, and it creates a much bigger problem than the original crack.
Another common mistake is using the wrong materials. Not all stucco is the same. Traditional cement stucco and synthetic stucco (EIFS) require different repair approaches and different products. Using an acrylic patch on cement stucco, or vice versa, can lead to adhesion failures. And using regular caulk instead of elastomeric caulk means your repair won’t flex with temperature changes, so it’ll crack again as soon as the weather shifts.
Rushing the cure time is another killer. Stucco needs time to cure properly, and in hot weather, it can dry too fast, which causes shrinkage cracks. We know to mist the repair area lightly with water during the curing process to slow down the drying and prevent stress cracks. If you’re doing this yourself, plan to keep the patched area damp (not wet) for at least 24-48 hours, especially if you’re working in direct sun or during the summer. Cover it with plastic sheeting between mistings to hold moisture in.
Texture matching is where most DIYers struggle. Even if your repair bonds perfectly and cures correctly, if the texture doesn’t match the surrounding stucco, it’s going to be visible. This is more art than science. You’ll need to experiment on a piece of cardboard first to figure out whether a damp sponge, a stippling brush, or a trowel technique gets you closest to the existing finish. And even then, it might not be perfect. If you’re repairing a small area on a wall that’s mostly hidden, a slight mismatch might not bother you. If you’re patching the front of your house, that’s a different calculation.
The best way to repair stucco cracks is to take your time, use the right materials for your specific stucco type, prep the surface correctly, apply the repair in thin layers if needed, allow proper cure time with moisture management, and be realistic about whether you can match the texture well enough for your standards. If any part of that process feels uncertain, that’s your signal to call a professional. We’ve been doing this for over 20 years in Central Florida, and we know exactly how to handle the climate challenges, material selection, and texture matching that trip up most homeowners.
Common DIY Stucco Repair Mistakes That Cost More Than Hiring a Pro
The math on DIY stucco repair seems simple: spend $30 on materials instead of $200-$800 on a professional. But that calculation changes fast when the repair fails and you end up paying a contractor to fix both the original problem and the damage your DIY attempt caused.
The most expensive mistake is misdiagnosing the problem. Homeowners see a crack and assume it’s just a crack. But if that crack is actually a symptom of water intrusion, foundation movement, or failed flashing around a window, patching it does nothing to solve the underlying issue. The crack comes back, often wider and in more places, and now you’re looking at remediation work that can run into the thousands. A professional inspection would have caught that upfront, but once you’ve sealed over the evidence and the problem has progressed, the repair gets more complicated and more expensive.
Using incompatible materials is another costly error. If you grab the wrong type of patch from the hardware store—say, a cement-based product when you have acrylic stucco, or a rigid filler when you need something flexible—it won’t bond correctly. It might look fine initially, but it’ll start delaminating within a few months. When that happens, you can’t just patch over the patch. The failed repair has to be chiseled out, the area has to be re-prepped, and the whole process starts over. Now you’ve spent money on materials twice, wasted your time, and you still need to hire someone to do it right.
Poor surface preparation is the silent killer of DIY repairs. If the crack isn’t clean and dry, if there’s loose material you didn’t remove, or if there’s dust preventing adhesion, your patch will eventually pull away from the wall. This is especially common in Florida because humidity makes it harder to get surfaces truly dry, and homeowners often don’t realize that what looks dry on the surface might still have moisture underneath. We use moisture meters and know how to assess whether conditions are right for a repair. DIYers are usually guessing.
Texture mismatches might not cause structural problems, but they do affect your home’s value and curb appeal. A poorly matched patch stands out, and if you’re planning to sell your home in the next few years, that visible repair can raise questions for buyers about what else might be wrong. We have the experience to match textures seamlessly, or we’ll recommend painting the entire wall to create a uniform appearance. When you DIY and the texture doesn’t match, your options are limited: live with it, try to redo it (and possibly make it worse), or hire someone to fix it anyway.
And then there’s the time factor. What looks like a quick Saturday project often turns into multiple trips to the hardware store, hours of YouTube research, trial and error on texture matching, and days of waiting for proper cure time. If you value your time at even a modest hourly rate, the “savings” from DIY start to shrink. Add in the risk of failure and the cost of professional remediation if something goes wrong, and the financial case for DIY gets a lot less compelling.
We see failed DIY repairs regularly. We’re not judging—we get why homeowners try to save money. But we also know that when a repair is done right the first time, it lasts. Our 5.0 Google rating and 20+ years in business come from delivering repairs that don’t need to be redone, and for most homeowners, that peace of mind is worth more than the cost difference between DIY and professional work.
Making the Right Call for Your Home and Your Budget
The decision between DIY and professional minor stucco repair isn’t about whether you’re capable—it’s about whether the specific damage you’re dealing with is truly minor, whether you have the time and materials to do it correctly, and whether the risk of failure is worth the potential savings. For small, isolated hairline cracks with no signs of moisture or structural issues, a DIY approach with the right materials and proper technique can absolutely work. For anything more complex, anything involving water damage, or anything you’re not completely confident about, the cost of hiring a professional is almost always less than the cost of fixing a failed DIY repair.
In Orange County, FL, where humidity, heat, and storms put constant pressure on exterior walls, stucco repairs need to account for climate-specific challenges that most homeowners don’t think about. That’s where experience matters. We’ve spent over two decades working with Central Florida’s weather, understanding how moisture moves through stucco systems, and delivering repairs that hold up year after year. If you’re weighing your options and want a straight answer about what your specific situation needs, reach out to us at CF Stucco and Painting for a clear assessment and a realistic estimate.