You’ve seen it happen. A neighbor paints their house, and two years later, the paint’s already peeling around the windows. Or bubbling on the south-facing wall. Maybe you’re standing in your own driveway right now, looking at faded siding and wondering if you’re about to make an expensive mistake.
Here’s what most people don’t realize: the paint job that fails isn’t usually a paint problem. It’s a prep problem. And in Florida, where the sun, humidity, and storms put your exterior through hell, preparation isn’t just important—it’s everything. This guide breaks down exactly what needs to happen before the first brush touches your house, so your paint job actually protects your home instead of just covering it up for a couple years.
Why Exterior Painting Preparation Protects Your Investment
Paint doesn’t stick to dirt. It doesn’t bond with loose, flaking surfaces. And it definitely can’t protect wood that’s already rotting underneath.
That’s the reality most homeowners face when they skip proper prep work. The paint might look fine for six months, maybe a year. Then the Florida sun starts breaking down the bond. Humidity gets trapped underneath. Afternoon thunderstorms find their way into tiny cracks you never sealed. Before you know it, you’re looking at peeling, bubbling, or worse—water damage that’s now hidden under a fresh coat of paint.
In Florida’s climate, exterior paint typically lasts 5 to 7 years when done right. Skip the prep, and you’re looking at 2 to 3 years before you’re back at square one. The difference isn’t the paint. It’s what happens before the paint ever goes on.
Preparation to Paint Exterior of House: Building a Lasting Foundation
Think of preparation as the foundation your paint sits on. You wouldn’t build a house on cracked concrete and hope it holds up. Same principle applies here.
The preparation to paint exterior of house starts with understanding what you’re working with. Walk around your property and actually look. Not just at the obvious peeling spots, but at everything. Check the areas that get hammered by afternoon sun. Look at the north side where mold loves to grow in the shade. Run your hand along the trim around windows and doors—if you feel a chalky residue, that’s your paint breaking down.
Florida’s humidity does something most people don’t think about. It doesn’t just sit on top of your paint. It works its way underneath, especially if there are any gaps in your surface. Once moisture gets behind the paint, it creates blisters. Those blisters pop. Then you’ve got exposed wood or stucco that’s now vulnerable to real damage.
This is why surface inspection isn’t optional. You need to know where the weak spots are before you start. Cracks in stucco. Soft spots in wood siding. Areas where old caulk has pulled away from trim. Every one of these is a future failure point if you don’t address it now.
The other thing Florida throws at you is mold and mildew. You’ve seen it—those black or green streaks in shaded areas or anywhere that stays damp. That’s not just ugly. It’s actively eating away at your paint’s ability to protect the surface. You can paint right over it, and it’ll just keep growing underneath, pushing the new paint off from the inside out.
Temperature swings matter too. Your exterior walls heat up to 140 degrees in summer sun, then cool down at night. That expansion and contraction puts stress on everything. If your surface isn’t properly prepared—if old paint is loose, if cracks aren’t filled, if the substrate isn’t sound—that daily stress will tear your new paint apart faster than you’d think.
What Happens When You Skip Proper Surface Prep
Let’s talk numbers, because this is where the cost of skipping prep becomes real.
A properly prepared exterior paint job in Central Florida should give you 7 to 10 years. Some premium applications with the right products and perfect prep can push even further. But the average paint job without proper preparation? You’re looking at 3 to 5 years before you’re dealing with serious problems. Some homeowners see failure in as little as 18 months.
The difference comes down to adhesion and protection. Paint needs a clean, sound surface to bond to. When you skip the pressure washing, you’re asking paint to stick to dirt, pollen, and mildew. It won’t. When you don’t scrape off the loose paint, you’re building new layers on top of a surface that’s already failing. When you paint over rotted wood without replacing it, you’re just hiding damage that’s going to get worse.
Florida’s climate accelerates all of this. The UV radiation here is intense. It breaks down the chemical bonds in paint binders, causing that chalky residue you see on older paint jobs. High humidity—averaging around 74% in Central Florida—creates constant moisture exposure. That moisture works its way into any weak point in your paint system.
Then you’ve got the afternoon thunderstorms. Every time rain hits your house, it’s testing your paint job. Water finds cracks. It seeps into gaps around windows and trim. If those areas weren’t properly caulked during prep, water gets behind the paint. Once that happens, you get blistering and peeling.
Coastal areas add another layer of challenge with salt air. Even if you’re not directly on the beach, salt particles in the air accelerate paint breakdown and corrosion, especially on metal surfaces like gutters and trim.
Here’s what happens in the typical failed paint job: Year one looks great. Year two, you start seeing some fading on the south and west walls. Year three, you’ve got peeling around windows and doors where moisture got in. Year four, the peeling has spread, and now you’re seeing bubbling in other areas. By year five, you’re either living with an eyesore or you’re paying to do the whole thing over again.
Compare that to a properly prepped job. Year one looks great. Year five still looks great. Year seven, maybe you’re seeing some minor fading in the most sun-exposed areas, but the paint is still protecting the surface. Year ten, you’re ready for a refresh, but you’re not dealing with damage—just updating the look.
Step-by-Step Exterior Painting Preparation Process
Now let’s get into what actually needs to happen. These aren’t suggestions. These are the steps that separate a paint job that protects your home from one that just looks good for a few months.
The sequence matters. You can’t skip around or do things out of order and expect the same results. Each step builds on the last one, creating a surface that’s ready to hold paint for years.
Start with cleaning, move to repairs, then prime, then paint. Miss a step or do them backwards, and you’re compromising the entire job. It’s that straightforward.
Pressure Washing, Cleaning, and Surface Treatment
Everything starts with getting your exterior clean. Not garden-hose clean. Actually clean.
Pressure washing is your first move. It removes the dirt, mildew, loose paint, and all the grime that’s built up on your siding. In Florida, this step is non-negotiable because of how much mold and mildew we deal with. That stuff grows in our climate like nowhere else, and if you paint over it, it just keeps growing underneath your new paint.
Use the right pressure setting for your surface. Too much pressure on wood siding can actually damage it, gouging the wood and making things worse. Stucco can handle more pressure, but you still need to be smart about it. The goal is to clean without destroying the surface you’re about to paint.
After pressure washing, you need to wait. This is where impatience kills paint jobs. Your surface needs 24 to 48 hours to dry completely before you do anything else. Paint won’t adhere to damp surfaces. In Florida’s humidity, that drying time might need to be even longer, especially if you’re working on a shaded side of the house.
While the surface is drying, inspect for mold and mildew that the pressure washer might have missed. Look for those black, green, or brown stains, especially in shaded areas or anywhere water tends to collect. If you see it, treat it with a bleach solution—about three parts water to one part bleach—or use an EPA-registered fungicide. This kills the growth at the root so it doesn’t come back through your new paint.
Next comes scraping. Every bit of loose or peeling paint has to come off. You’re looking for paint that’s already failing, and you’re removing it so your new paint has something solid to bond to. Use a pull-style scraper and work with the grain of the wood if you’re on wood siding. On stucco, focus on areas where paint is bubbling or flaking.
This part is tedious. It’s not fun. But it’s essential. If you leave loose paint on the surface, your new paint will only be as strong as that weak layer underneath. It’ll peel right off, taking your new paint with it.
After scraping comes sanding. This creates what’s called a mechanical bond—a slightly rough surface that gives paint something to grip. You’re not trying to sand everything down to bare wood unless it’s in really bad shape. You’re just roughing up the surface and smoothing out the edges where old paint meets bare spots. Medium-grit sandpaper works for most applications. For trim that’s getting a glossy or semi-gloss finish, a second pass with fine-grit paper helps.
Repairs, Caulking, and Priming for Long-Term Protection
Once your surface is clean and smooth, it’s time to fix what’s broken.
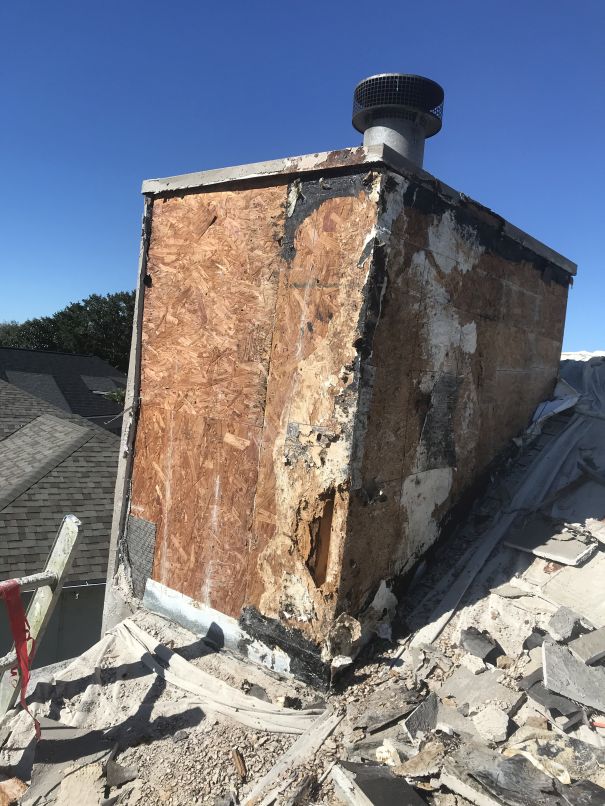
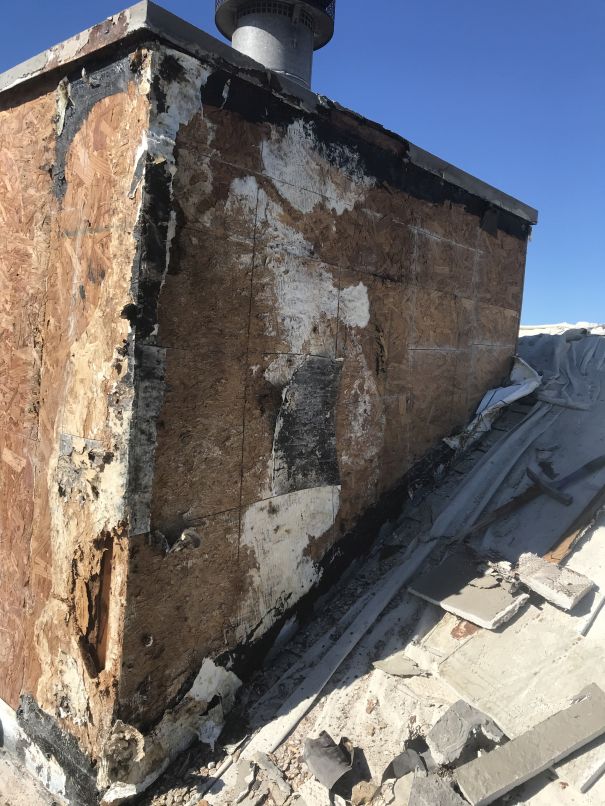
Wood rot is common in Florida, especially around windows, doors, and anywhere water tends to collect. If you’ve got soft, spongy wood, you need to replace it. Not fill it. Not paint over it. Replace it. Rotted wood won’t hold paint, and more importantly, it’s a structural issue that’s only going to get worse if you cover it up.
This is where our experience with both painting and the underlying structure makes a difference. We handle wood repair under stucco when needed, which means we’re not just covering problems—we’re actually fixing them before we paint.
For smaller imperfections—nail holes, small cracks, minor damage—use an exterior-grade wood filler or patching compound. Fill the holes, let it dry completely, then sand smooth. The goal is a surface that’s as even as possible so your paint goes on uniformly.
Caulking is next, and this is where a lot of DIY jobs fall apart. You need to seal gaps around windows, doors, and trim. Anywhere two different materials meet. Anywhere water could potentially get behind your siding. Use a high-quality exterior caulk that’s paintable and designed for the kind of movement and temperature swings we get in Florida.
Here’s the thing most people get wrong: don’t caulk the bottom edge of your siding. That area needs to breathe. It’s designed to let moisture escape from behind the siding. If you seal it up, you’re trapping moisture inside, which leads to rot and paint failure from the inside out.
After caulking, you prime. Any bare wood needs primer. Any patched areas need primer. If you’re changing colors significantly—going from dark to light or light to dark—you should prime everything. Primer creates a uniform surface for your topcoat and improves adhesion dramatically.
In Florida’s humid climate, use a primer that’s designed for moisture resistance. This is especially important if you’re painting stucco, which is porous and can absorb moisture. A good primer seals the surface, prevents moisture from getting through, and gives your topcoat something solid to bond to.
Don’t skip priming to save time or money. It’s one of the most important steps in the entire process. A properly primed surface will hold paint for years longer than one that’s not primed.
Making Your Exterior Paint Job Last in Florida’s Climate
Here’s the bottom line: prep work isn’t the exciting part of painting your house. It’s time-consuming, it’s detail-oriented, and it’s easy to convince yourself that shortcuts won’t matter.
But in Florida’s climate, those shortcuts show up fast. The sun, humidity, and storms don’t care how good your paint looks on day one. They’re testing the bond between that paint and your surface every single day. If the prep wasn’t done right, the paint fails. And when it fails, you’re not just looking at an ugly house—you’re looking at potential water damage, rot, and repairs that cost way more than doing the prep right in the first place.
The homes that still look good seven, eight, ten years after painting? They all have one thing in common: someone took the time to prepare the surface properly. They cleaned it thoroughly. They scraped off the loose paint. They repaired the damage. They primed correctly. Then they painted. If you’re ready to do this right, we bring over 20 years of experience with Florida’s specific challenges to every project, handling everything from surface prep to the final coat with the attention to detail your home deserves.